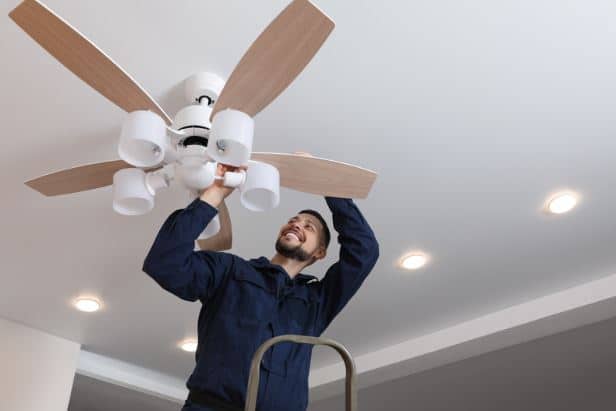
Adding a ceiling fan to a room can be a game-changer. Not only does it enhance the aesthetic appeal, but it also improves air circulation and energy efficiency. However, installing a ceiling fan where no fixture exists can be a bit challenging. This comprehensive guide will help you understand the process, the costs involved, and when to call a professional electrician to ensure safety and efficiency.
Understanding the Importance of Ceiling Fans

Ceiling fans are more than just decorative items; they are functional and can significantly reduce energy costs. According to Energy.gov, ceiling fans can allow you to raise the thermostat setting about 4°F with no reduction in comfort. This can lead to substantial savings on your energy bills, especially during the summer months.
7 Steps for Installing a Ceiling Fan Without an Existing Fixture
Step 1: Choose the Right Location
The first step is to decide where you want to install the ceiling fan. Ensure that the location has sufficient support for the fan’s weight and that it is centered in the room for optimal air circulation.
Step 2: Turn Off the Power
Safety first! Turn off the power to the room at the circuit breaker. Use a voltage tester to ensure there is no electricity running to the area where you’ll be working.
Step 3: Gather the Necessary Tools and Materials
Before you start, make sure you have all the required tools and materials. This includes:
- Ceiling fan and mounting bracket
- Fan-rated electrical box
- Electrical wires
- Wire connectors
- Screwdriver
- Drill
- Stud finder
- Voltage tester
Step 4: Install the Electrical Box
Since there is no existing fixture, you need to install a fan-rated electrical box. Locate a ceiling joist with a stud finder and attach the electrical box securely. This box must be rated to support the weight of the ceiling fan.
Step 5: Run Electrical Wiring
If you are comfortable with electrical work, you can run the necessary wiring from a power source to the new electrical box. If not, this is a critical step where you might want to call a professional electrician to ensure everything is up to code and safe.
Step 6: Assemble and Mount the Ceiling Fan
Follow the manufacturer’s instructions to assemble the ceiling fan. Attach the mounting bracket to the electrical box, then connect the wires from the fan to the corresponding wires in the ceiling (black to black, white to white, and green/bare to the ground wire). Secure the fan to the mounting bracket and ensure all connections are tight.
Step 7: Attach the Blades and Test
Once the fan body is securely installed, attach the blades and any additional parts, such as light kits. Restore power to the room and test the fan to ensure it is operating correctly.
Costs Associated with Installing a Ceiling Fan
The cost of installing a ceiling fan where no fixture exists can vary based on several factors:
- Ceiling Fan: A good-quality ceiling fan can range from $50 to $500.
- Electrical Box: Fan-rated boxes typically cost between $10 and $20.
- Wiring and Connectors: Additional materials like wires and connectors can add another $20 to $50.
- Professional Electrician: Hiring a professional electrician can cost between $50 and $100 per hour. A simple installation may take 2-3 hours, but running new wiring and installing the box can increase this time.
When to Call a Professional Electrician
While some homeowners may feel confident tackling this project, it’s crucial to know when to call a professional electrician:
- If you are uncomfortable working with electrical wiring.
- If you are unsure about the structural support for the fan.
- If you encounter any issues during the installation process.
- If the electrical work involves complex wiring or upgrading your electrical panel.
Professional electricians ensure that the installation is safe, up to code, and functions correctly. According to HomeAdvisor, the average cost to hire an electrician ranges from $160 to $520, depending on the complexity of the job.
Benefits of Professional Installation
Hiring a professional can save you time and ensure the job is done correctly. It also provides peace of mind knowing that the installation complies with local building codes and safety standards.
Quick Statistics on Electrical Service Costs
- Ceiling Fan Installation: On average, it costs $250 to $600 for professional installation where no fixture exists.
- Preventive Maintenance: Regular electrical maintenance can save up to 30% on energy bills and reduce the risk of electrical fires.
Boosting Home Value with Energy-Efficient Ceiling Fans

Installing ceiling fans can also boost your home’s value. Prospective buyers appreciate energy-efficient features, and a well-placed ceiling fan can be a selling point. According to the National Association of Realtors, ceiling fans are one of the most desirable features in a home.
Installing a ceiling fan where no fixture exists can be a rewarding DIY project, but it’s essential to prioritize safety and know when to seek professional help. By following this guide and understanding the costs and benefits, you can enhance your home’s comfort and value while potentially saving on energy costs.
If you’re in Vancouver and need expert assistance with your ceiling fan installation or any other electrical services, contact Elpro Electric today. Our experienced electricians are here to ensure your home is safe, efficient, and comfortable.


